Reflections on ‘Ways of Seeing (with Computers)’
Review by Sébastien Robert
Photos by Jessica Dreu
In the lead-up to the ninth edition of Coded Matter(s) – read the review here – keynote presenter Elliot Woods led a two-day workshop entitled ‘Ways of Seeing (with Computers)’ in one of the studios of De Brakke Grond.
The workshop, was open to any coder, artist, VJ or designers interested in building interactive spatial installations. Personally, I didn’t have any background in coding, but thanks to Elliot’s educational talent and patience, I could follow the entire workshop. In the end I could even claim I’ve gained a surprising amount of skills from this experience.
Below are some insights into the two-day “hardcore calibration workshop” – at least from a newbie’s point of view.
Day one
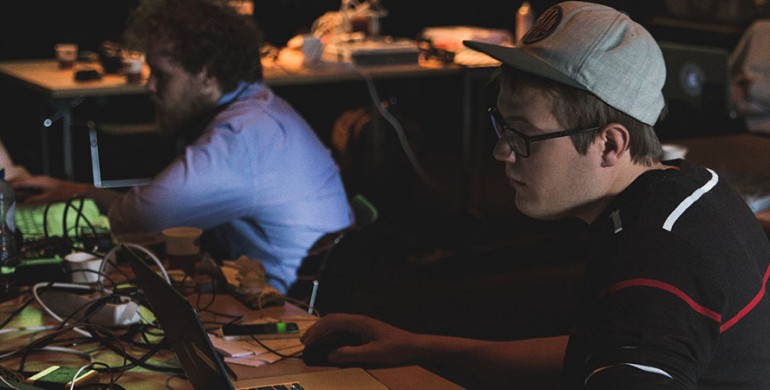
The meeting was set for Wednesday the 17th of June at 10:00 hrs. Elliot warmly welcomed the six participants of the workshop, all from different backgrounds (VJs, Projection Artists, scenographers, and more). After some quick introductions, Elliot explained how the workshop would look over the next two days: a hybrid theoretical-practical presentation of his Rulr toolkit, followed by some practical assignments to get comfortable with it.
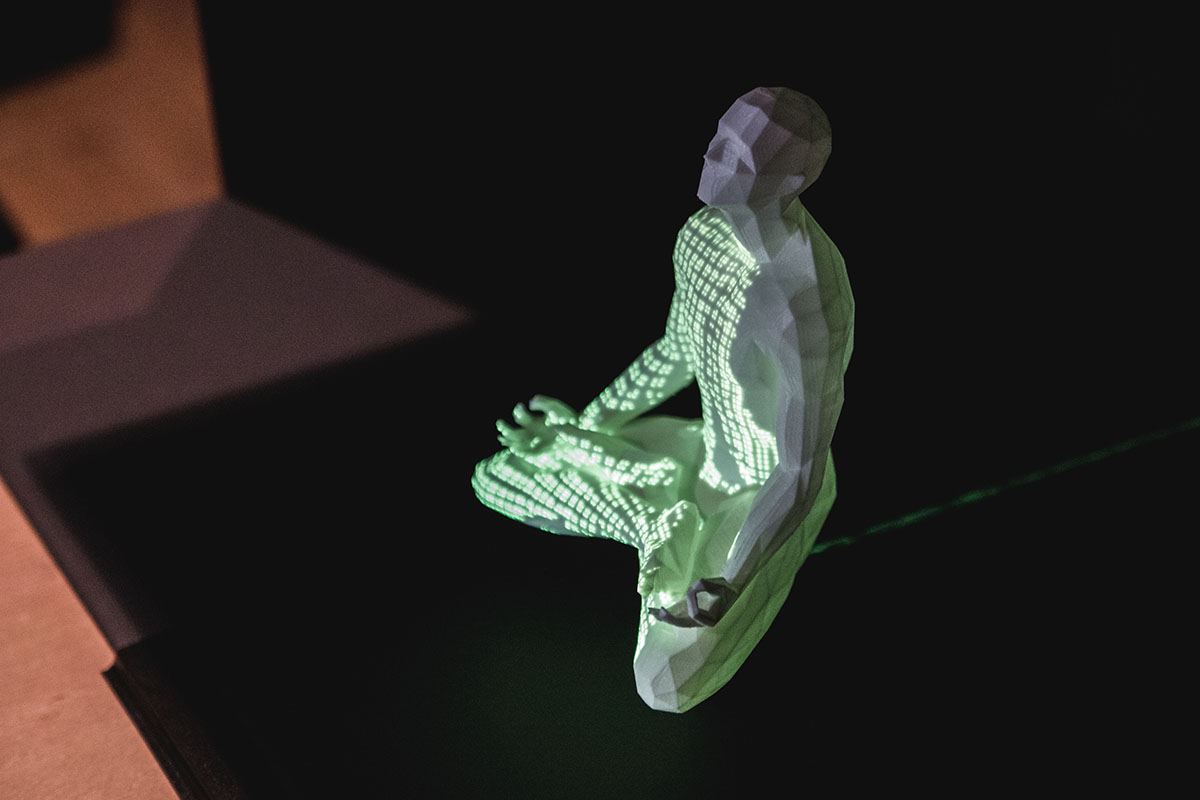
Basically, ‘Ways of Seeing (with Computers)’ revolved around the open source, node-based toolkit Rulr, created by the Seoul-based art studio that Elliot Woods founded together with Mimi Son, Kimchi and Chips. Rulr allows users to calibrate physical devices with the physical world. In order for these devices to deliberately manipulate space and matter, they should be sufficiently aware of their physical relationship with the world. The toolkit creates geometric understanding between optical, mechanical, and physical objects. In this case, we worked with cameras, Kinect, beamer projectors, 3D printed objects, our own bodies, and simple materials like paper and foamboard.
Without further ado, we dived into this software and its interface. Rulr is pretty simple to understand and I must say, its interface is both handy and aesthetically pleasing.

Next, Elliot presented some of the ideas behind this workshop. How does a camera work? What about a projector? What different points of view can we have on the same solid body? He answered these questions with some theoretical background on light and cameras, and some special attention to the way lenses work and why the focus is so important. Elliot explained that one intent of this workshop was to understand and explore the line between the digital and the physical world.
Soon enough, Elliot was all ears to any question, and did not hesitate to elaborate and re-explain when needed. This created a very pleasant atmosphere, and a good workflow for the rest of the workshop.
The lunch break was hard-earned, and provided a chance to relax and digest the amount of information we had accumulated in the morning. There was some time to expand on the technical aspects of the workshop for the professionals among us, to get better acquainted with Elliot and, to learn more about his previous lectures and installations.

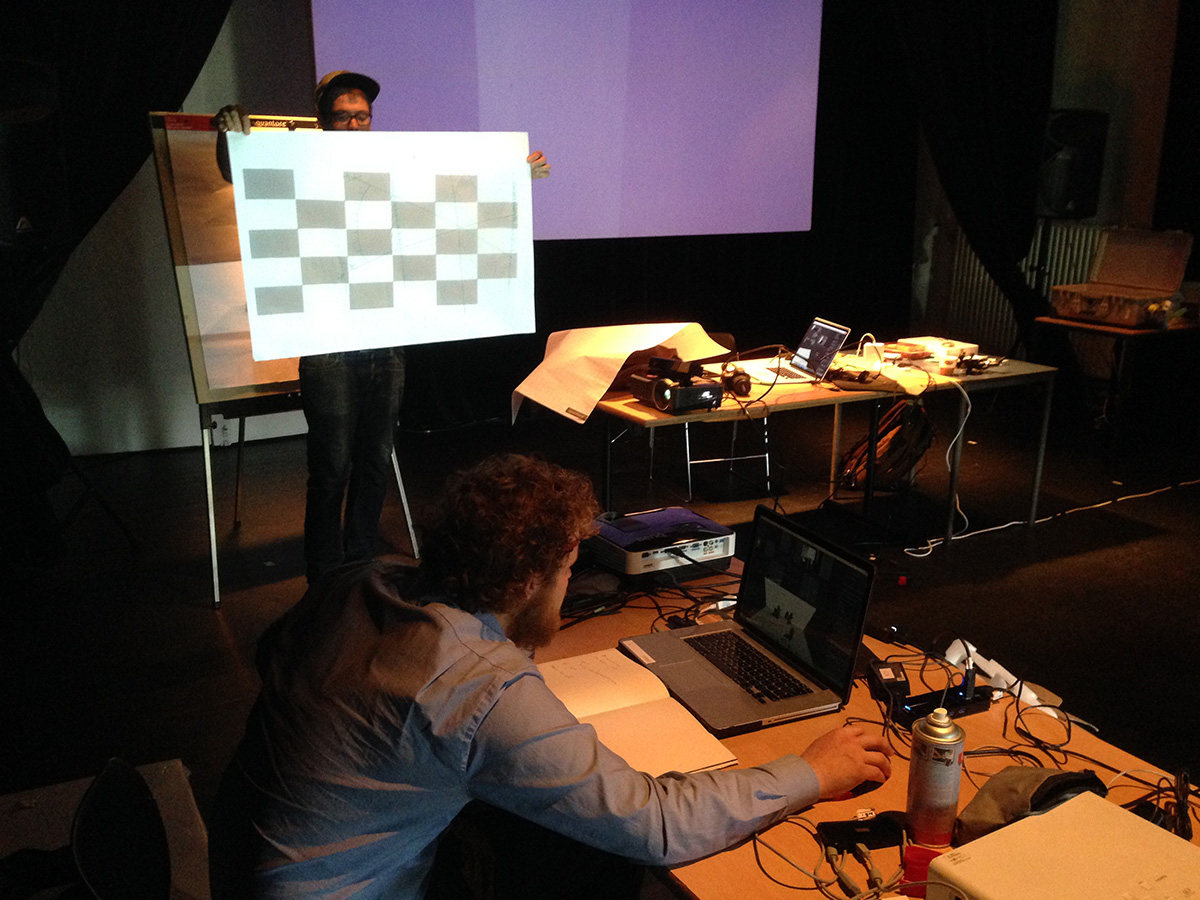
After a morning full of developing the theoretical aspects of the toolkit, it was time to put things into practice in the afternoon. In groups of two we followed Elliot’s instructions for calibrating the camera and the projector, which enables each device to recognize the other’s spatial position. This involved placing a camera on top of a projector, and calibrating both of them. By using a calibration board, which looks pretty similar to a chess board, we could determine the exact position of each device in the space of the studio.
We ploughed on to the next step: building black boxes, which would later be used to create scenes for mapping. At the centre of these boxes we placed white objects made out of 3D prints or paper. Using graycode scan, we performed a structured light scan of the scene, which allowed us to pinpoint the location of each projector pixel. This let us take a visual and spatial “reading” of the physical world. When viewed through Rulr, we were actually able to see the 3D shape of the object.
Day two
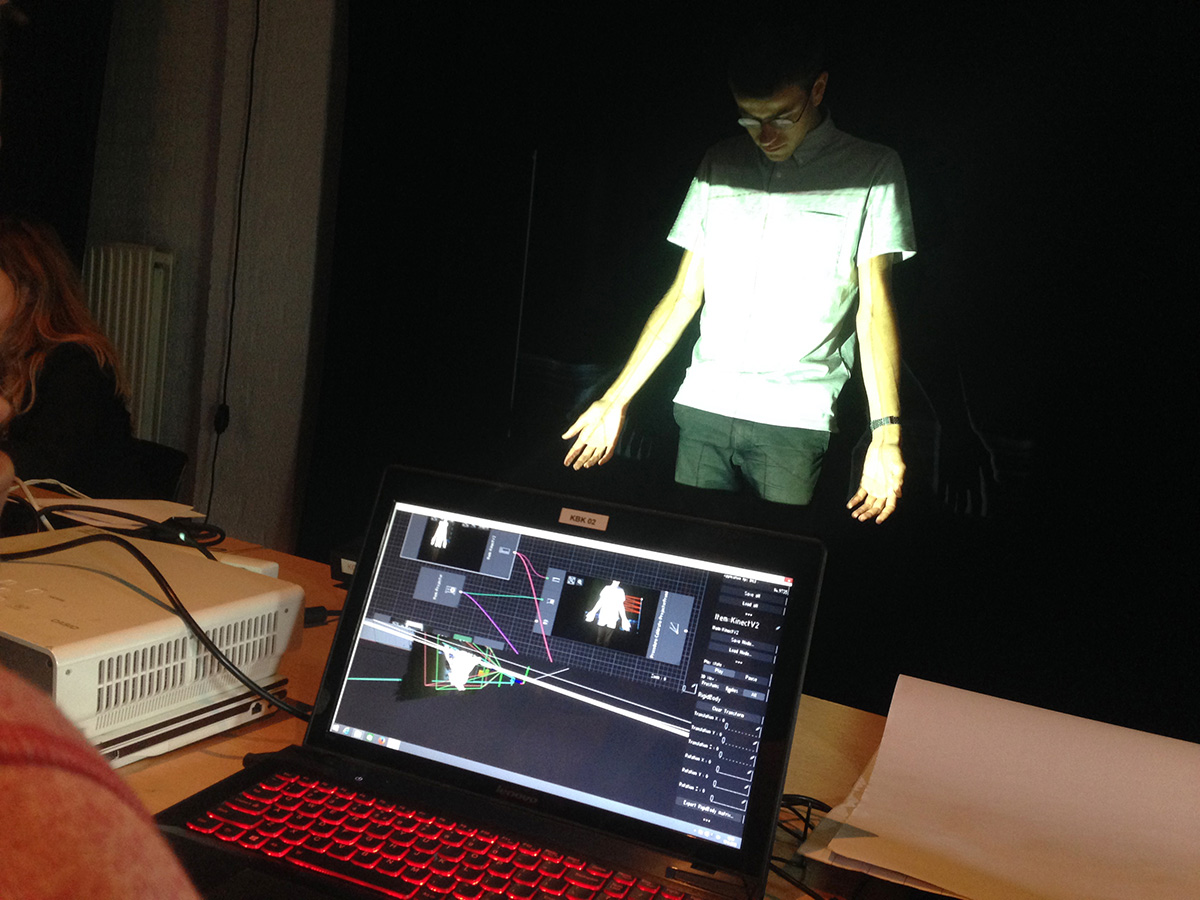
We went further in the process on the second day by adding the Kinect in the calibration. It was clear to see that achievement from the previous day were assimilated by the particpants, since every step was going faster. Elliot set the goal of the morning. We aimed to reach a triangulation between the camera, the kinect and the projector, which basically means calibrating these devices together to have a 3D image of the object in the scene. The kinect added more precision to the position of each projector pixel in the space.
For that purpose, we followed a strict set of instructions to calibrate the three used devices one by one, in order to have all the different points of view set up together. Then we made a triangluation of the 3D location of every projector pixel in Rulr.
In the afternoon, we loaded kinect & projector calibrations into vvvv to 3D projection-map on this object. This was my first time with the vvvv environement. My lack of knowledge limited me in a way, but the interface looks similar to Max MSP, which I am used to working with. It looks great and in the future I will definitely take some more time to dig more into it. Despite my lack of knowledge. Iwatched eagerly as the other participants went on using oscillations and different types of waves, creating multi-colour visual content on the objects.
This was an insightful and great workshop. It made me realize how these techniques, which at first seemed somewhat abstract to me, were in fact easily accessible. You only need a camera, a projector and some basic skills in Rulr to create cool things. I would definitely recommend this workshop to anyone who has the possibility to attend at coming events.
Sébastien Robert is the new intern at FIBER. Previously active in Smoke Machine, TodaysArt, and Mirage Festival, he’s also doing photography and electronic music.